Here is the github link to my group’s project on docker: https://github.com/software-students-spring2024/4-containerized-app-exercise-se-2pm4
Introduction
My first encounter with Docker was in a college class. I had no idea what it was, and was still confused after the lecture. My group had to make a project with 3 docker containers, each being a machine-learning client, web-application, and a database.
Docker Image
I think of docker images as taking a photo(as the name indicates) of an application, database, etc. Like how in real life from a photo we are able to remember what we did on a certain day, what clothes we wore, developers can use a docker image to quickly set up the resources needed to run an application. The docker image can be created using a file called Dockerfile, and the images can be uploaded to Dockerhub so other people can download the image and set up the exact same environment.
Why do we need Docker?
An application might work on a developer’s machine(computer), but it might not work when it is deployed in the server machine. This is because the two machines might have different settings or configurations. By using the same docker image the two machines have a project running in the same environment, so there won’t be a case where an application runs on one machine but doesn’t on another.
Docker Container
Once we download a docker image we can create an isolated environment where we can run our application. This isolated environment is the docker container. So, docker containers are “built” from docker images. Docker image can be considered as a blueprint of a house, and docker container can be considered as the actual house the application will live in.
Wrong approach with MongoDB
At first I thought that I had to create a new image for mongodb, upload my own image on docker hub, so that my teammates can pull(download) the image and build a container from it. I took a few days trying to figure out how to create a mongodb image, but it turns out that I can just use the mongodb’s image that is uploaded by mongodb themselves and I don’t need to write any Dockerfile for it! If you want to customize the mongodb server someway you can create a Dockerfile which extends the mongodb image and create a new image, but generally you can just use the mongodb image.
Docker image for ml-client and web-app
For the ml-client and web-app, we created a Dockerfile to create an image for each part.
The example Dockerfile is for the web-app. Please read the comments to see what each command is doing.
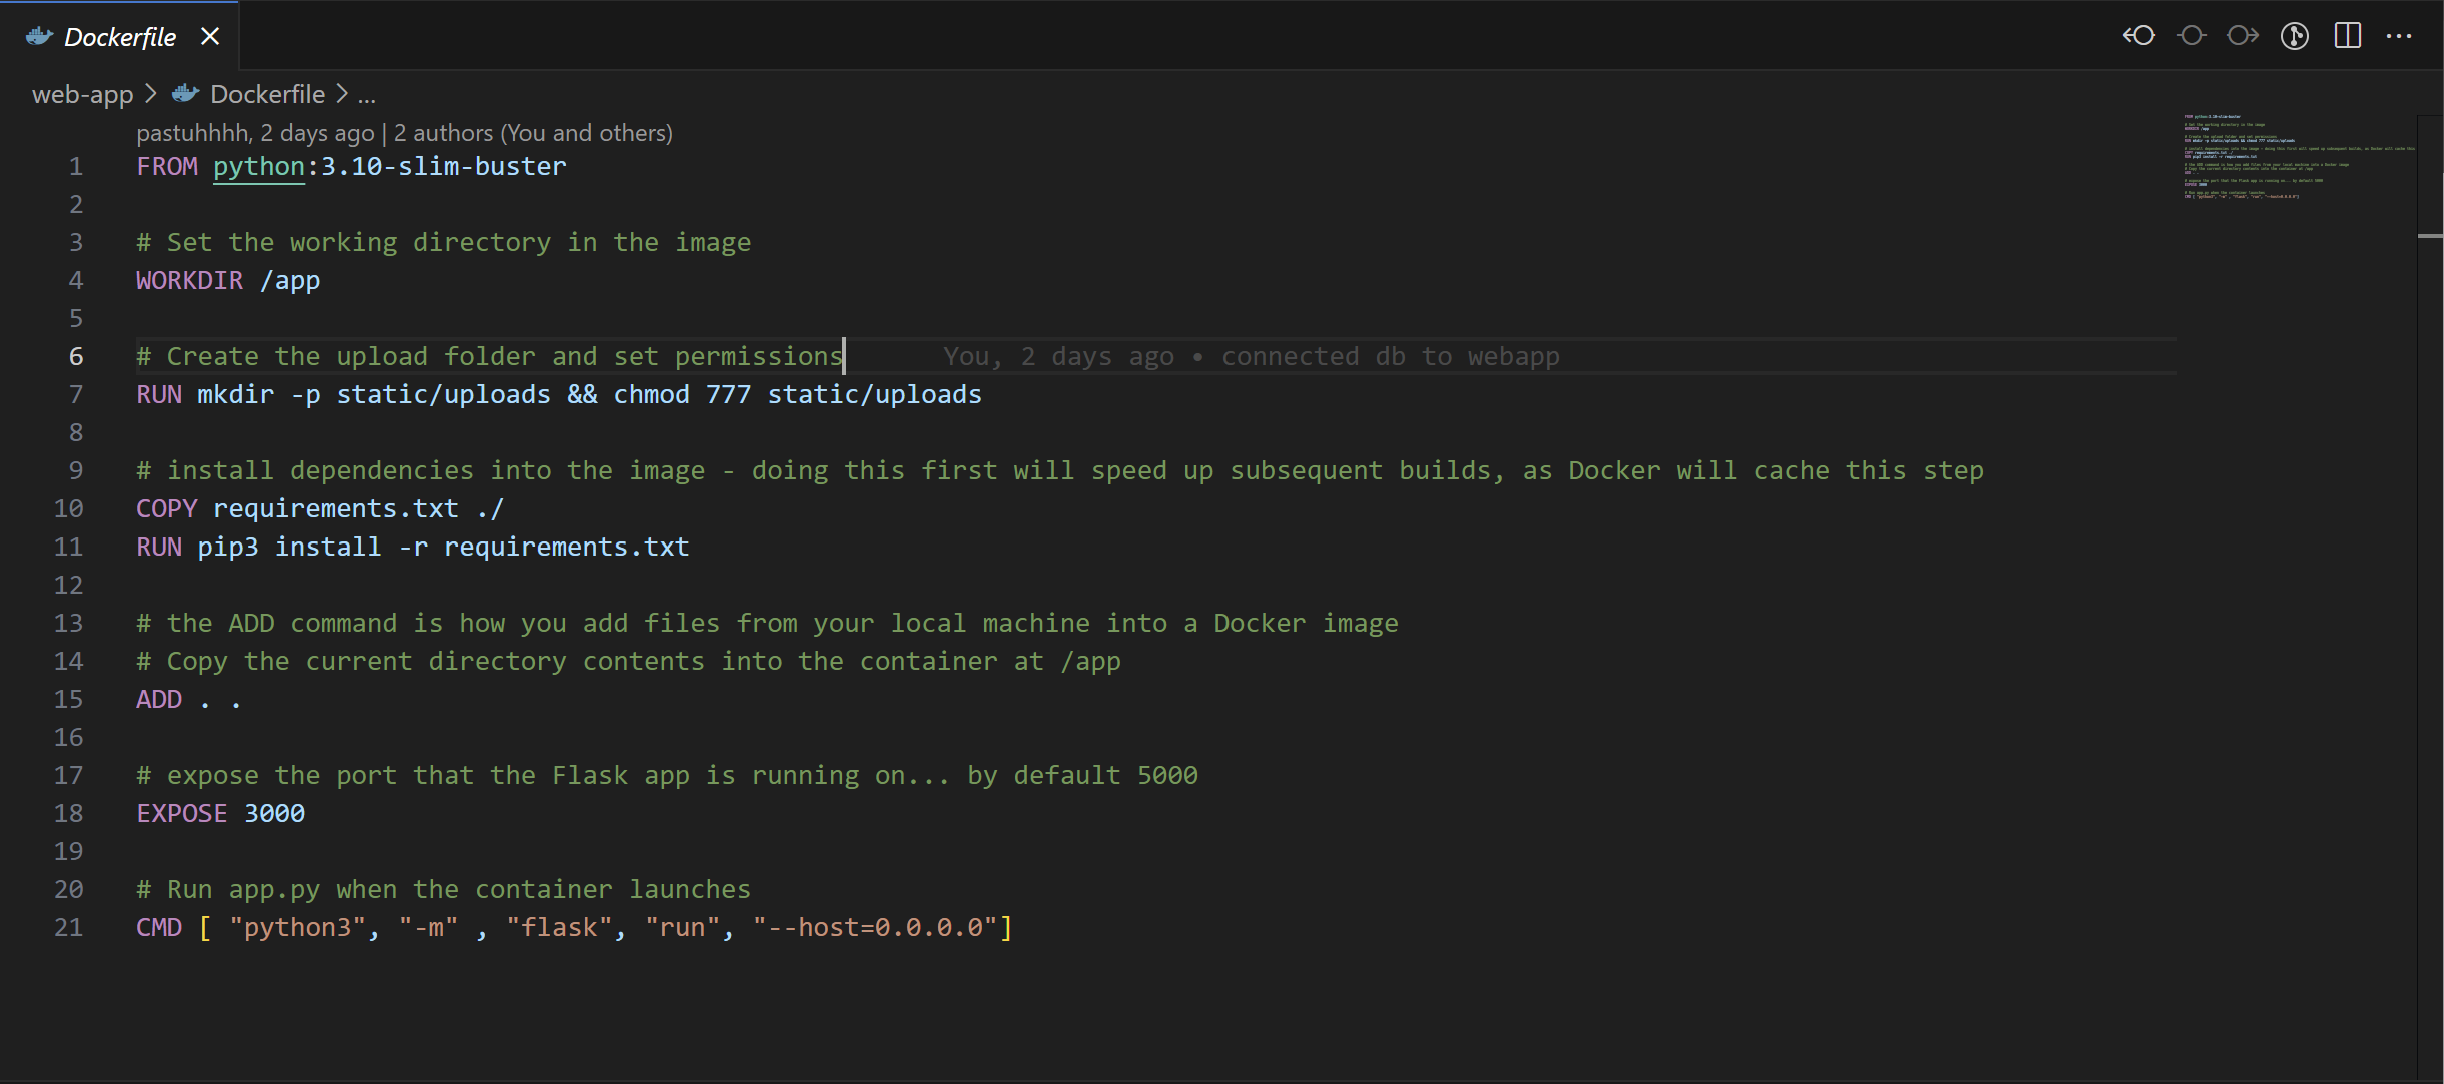
RUN mkdir -p static/uploads && chmod 777 static/uploads
A problem I encountered was that when I clicked upload from the web-app the database was being updated, but there was no photo actually being uploaded to the static/uploads folder. To fix this, I had to use the chmod 777 static/uploads command to give the directory permissions to upload to the directory.
Note on Image size: when writing a dockerfile, people usually do not write an image from scratch, but write the image from a base image. In the web-app, we used:
FROM python:3.10-slim-buster
Try to find a base image that has a small size, if you search online or docker hub you will be able to find versions with smaller sizes, for example with keywords like “slim”.
Docker-compose
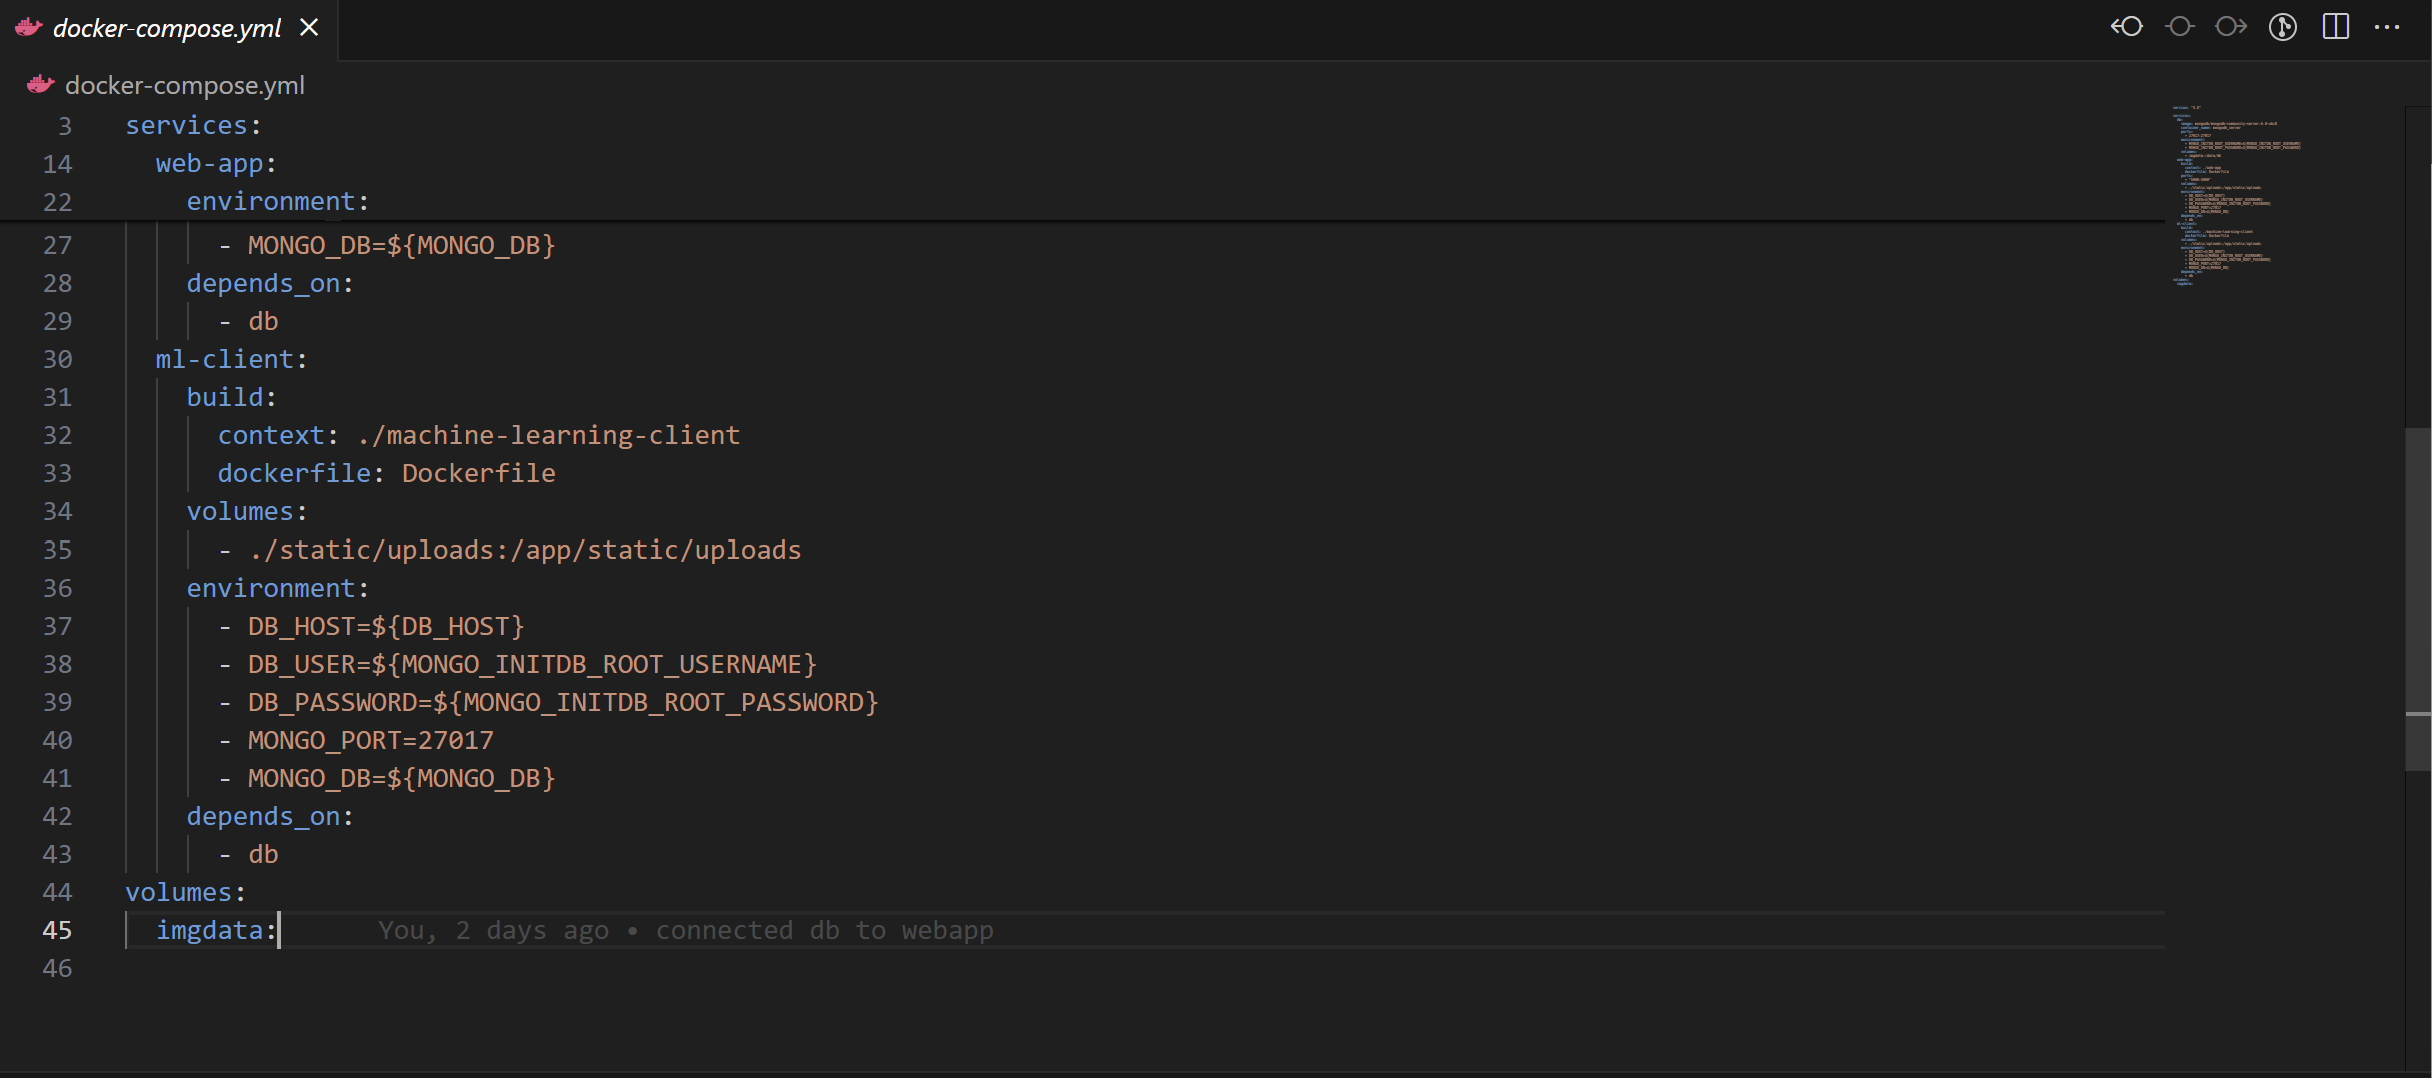
Docker-compose allows us to build many containers at the same time. The docker-compose.yml(or .yaml) file should be placed in the root directory of the entire project.
-
Environment: Things that go after the
environment:environment variables which are considered as settings to the particular docker container. For this project, most of them are related to the database. Variables inside${}are imported from a.envfile. This is to protect private information such as database username or password. -
Volume: Another problem that I encountered was that after connecting the mongodb to the web-app, once I closed all containers and rebuilt them all the data was gone. The volume section is used so that even if a user closes and rebuilds containers the data is still remembered in the local machine.
In this example, it follows this syntax:
[host_path]:[container_path]. This means that the files that are in./static/uploads(local machine directory) will be mounted on to the/app/static/uploadswhich is a directory inside a container.
./static/uploads:/app/static/uploads
For the db the volume syntax is quite similar:
    volumes:
      - imgdata:/data/db
I have set the imgdata myself as a local directory, but I saw from Programming with Mosh’s video: https://www.youtube.com/watch?v=HG6yIjZapSA&t=1580s that mongodb’s directory inside a container is set to default as /data/db, so I just followed it. Then he also mentions that at the bottom we need to include the name of the local directory in a syntax like in the image below, but does not explain why.
Random facts
Note: It is advised to not use pipenv with docker.
In the next episode, I will discuss more about what the project aims to do, and the methods we used to achieve our aims.